Installing Kali 2023
Hi Friends.
Today I have created a short blog post on how to install Kali Linux 2023.1, the latest version available from Offensive Security.
Firstly you will need to install some software to allow you to run the machine virtually on your Machine or alternatively to burn the .iso image file to a USB drive if you wish to install it on your system in a ‘dual boot’ configuration on an existing computer with a working Operating System or ‘bare metal’ where there is only the new OS (hello old laptop).
For the purposes of this guide I will walk you through setup via a software which is often called a ‘Hypervisor’.
Let’s get started
For this guide we are using the freely available Virtual Machine software Oracle - Virtual Box. There are other options available such as VMware (my preferred choice), The Windows HyperVisor Platform on Windows 10/11 Pro or if you are on Linux there’s QEMU, Virtual Machine Manager, VMware (again) even on MacOS with Paralells (and VMWare again) but this guide is for a primarily windows host environment and for as freely as possible.
Step 1: Download
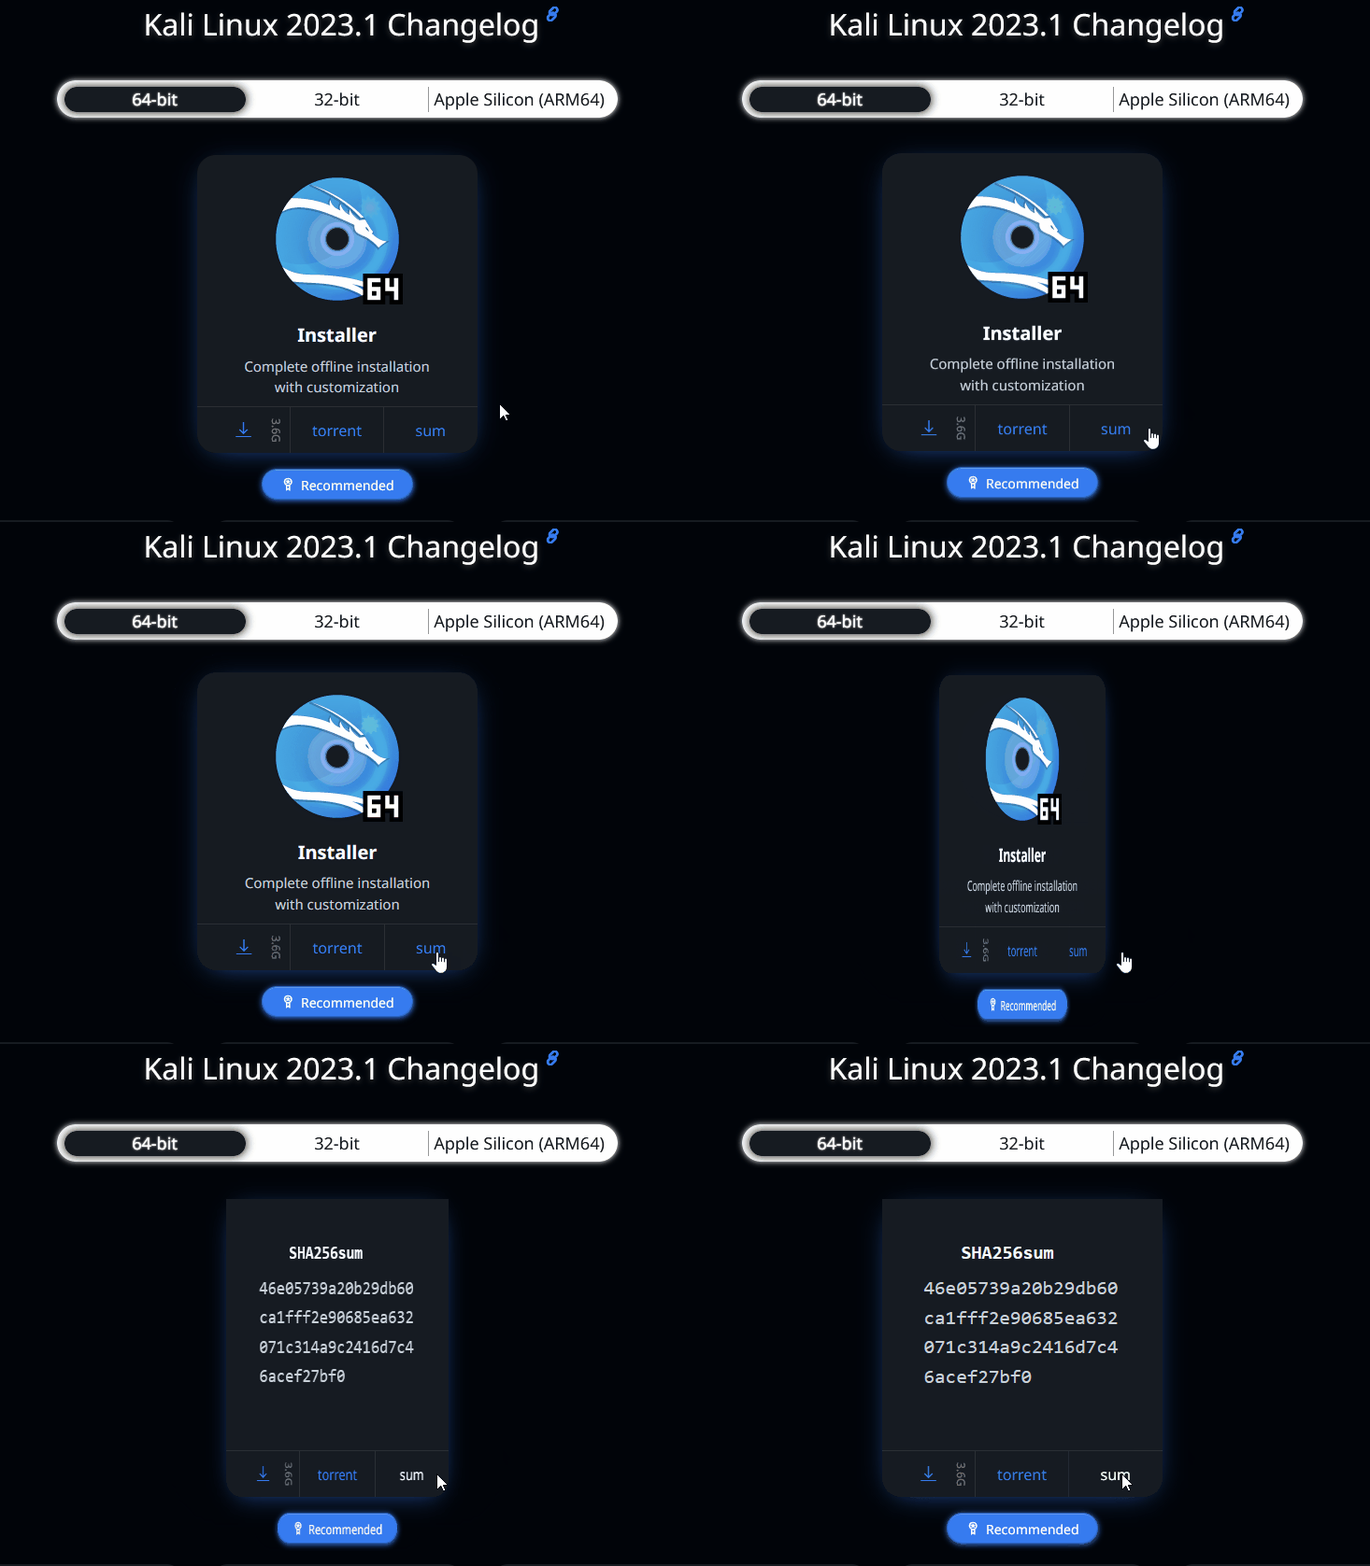
Initially you will need to download the software from the link above for your machine (in this case from ‘Windows hosts’) as well as the Kali 2023.1 iso image from Offensive Security.
Be sure to pick the option for ‘Installer Images’ and you can pick the direct download (around 3,5Gb) or the torrent option which is completely legal and usually much faster, you just need a Bittorrent client on your machine.
Step 2: Verify the ISO image
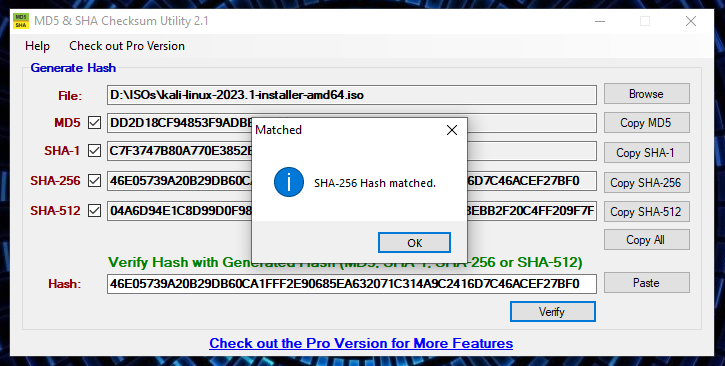
Once you have downloaded the ISO from Offensive Security it would be a good idea to confirm the SHA256 hash of the ISO;
This ensures that the download has not been tampered with and that it is not damaged in some way - this is honestly a really good habit to get into when getting software off the internet.
I prefer using a software solution to do this check as I can never remember the Powershell for it:
cough the PowerShell is:
1
Get-FileHash C:\<Path to downloaded file>\kali-linux-2023.1-installer-amd64.iso -Algorithm SHA256 | Format-List
Once verified we can move onto the next step.
Step 3: Prepare a new Virtual Machine
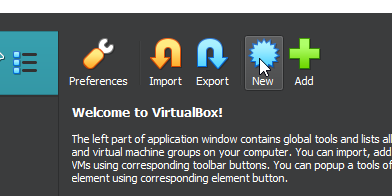
To build a new machine in Virtual Box you will need to click on the new option from the top bar:
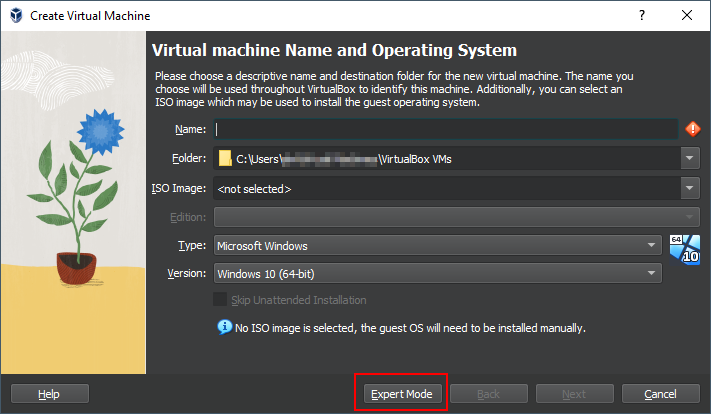
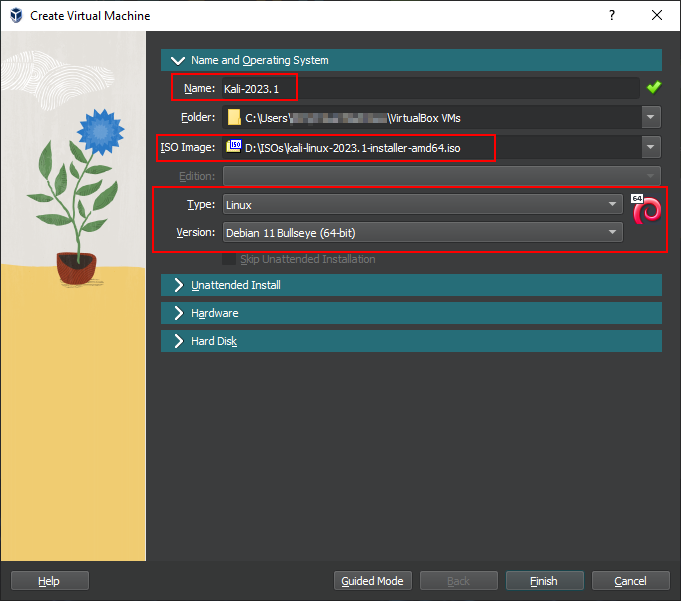
From here you can follow these steps highlighted in Red to get going as quickly as possible but for any in the audience to read along;
We select expert mode on the first screen we are presented with so that we are able to fine tune certain parts of the installation.
Here we have enter the name of the virtual machine (in this case Kali-2023.1), the location of the iso file we are installing from and also the type of Operating Sytem and Version of this also.
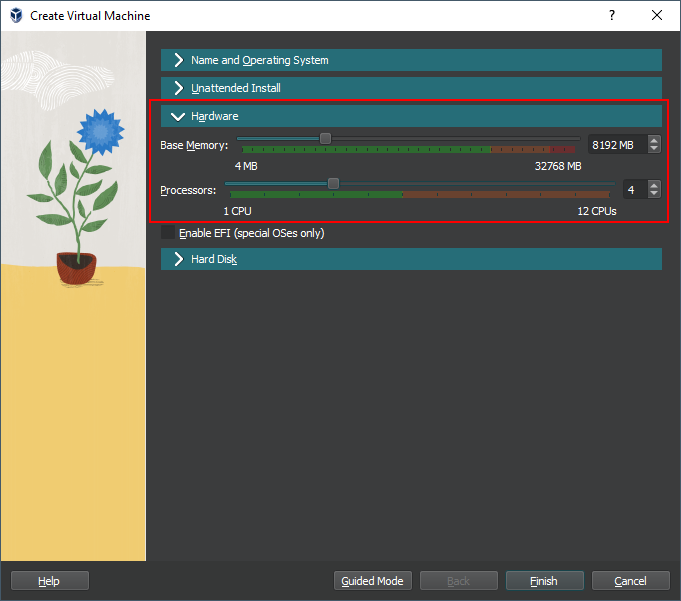
For Step 4 we configure the hardware side of this, now your machine will be different to mine, you may have less RAM and processor cores to play with (or you may have a great deal more) but this is how I configure the machine based on my needs and use case.
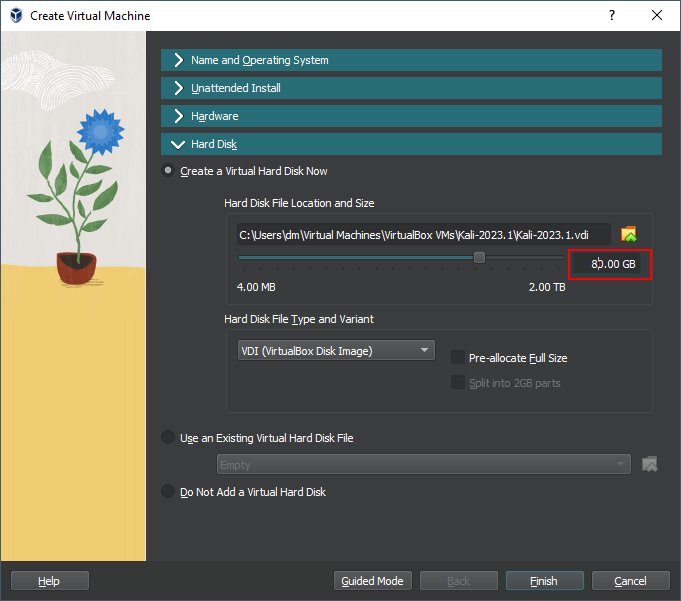
Next up you need to set the size of the Hard Disk the machine will be using, now this is not the same as when you install the Operating System directly as the ‘size’ is dynamically allocated and changes based on whats installed and saved on the virtual machine. In my case 80Gb is more than enough space to install and play with this Operating System.
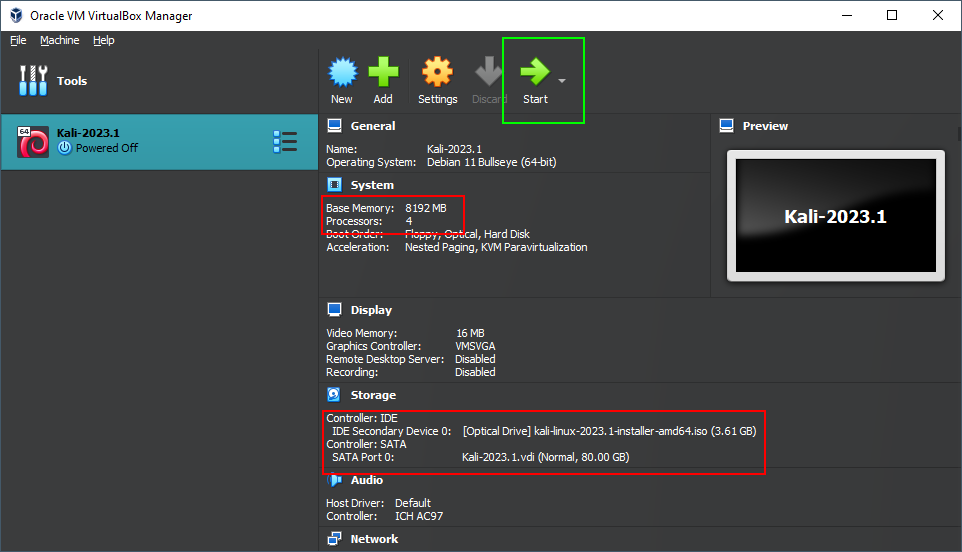
Final checks here as we are back on the Virtual Machine Manager, check your RAM, CPUs, ‘Optical drive’ i.e. the iso file and Virtual Hard Disk are detected.
If all checks out, hit the green Start Button.
Step 4: Install your new Operating System
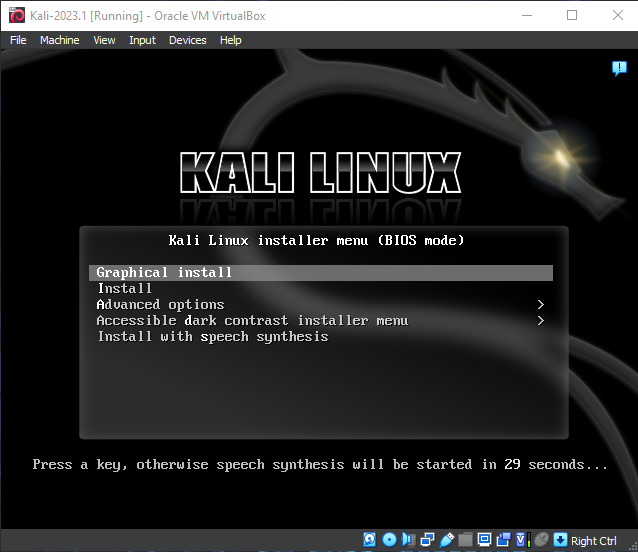
After clicking Start you will be presented with a popup window, that window is the ‘display’ of your new computer, in this case it will load to the boot menu from the Kali iso file.
Select the first option to begin the Graphical Installation process (difference between this and the ‘Install’ option is that it’s easier on the eyes and more easy to understand if you are new to this process);
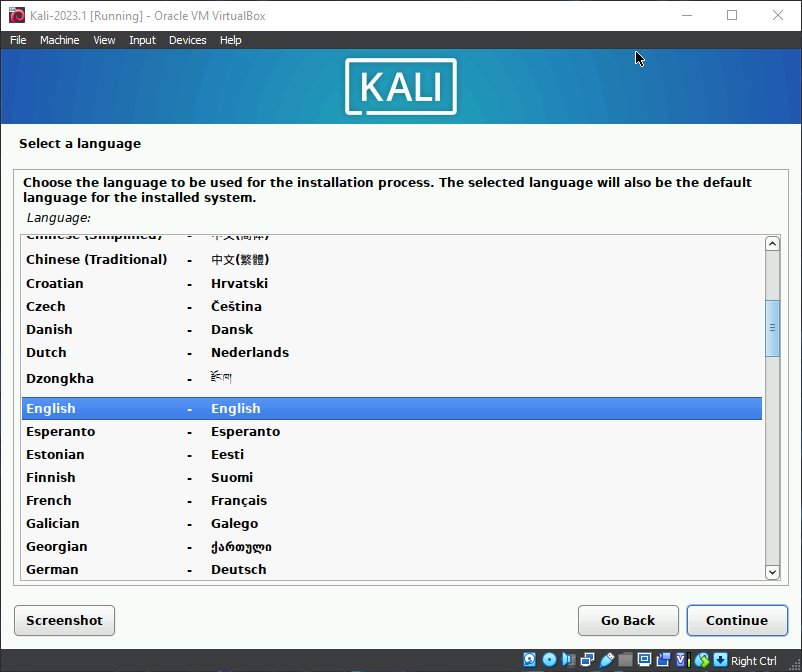
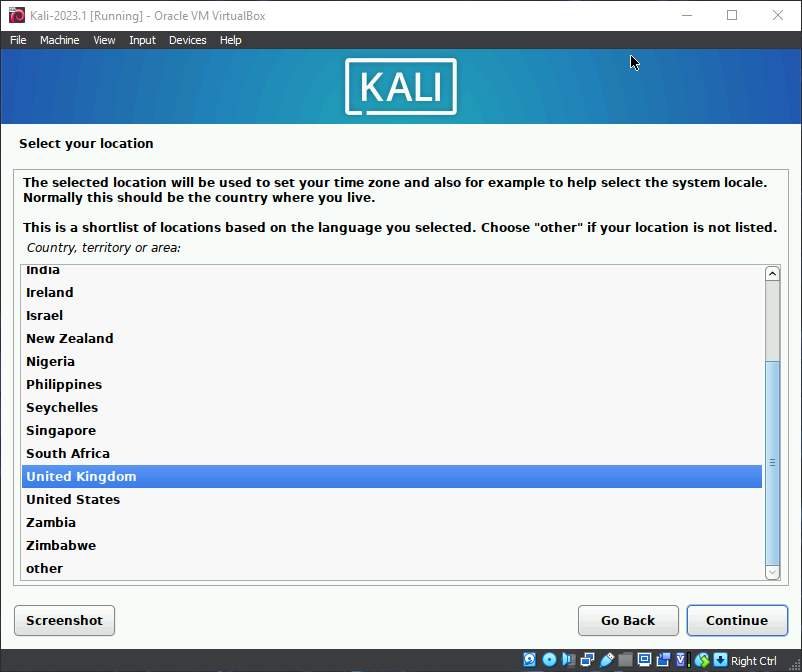
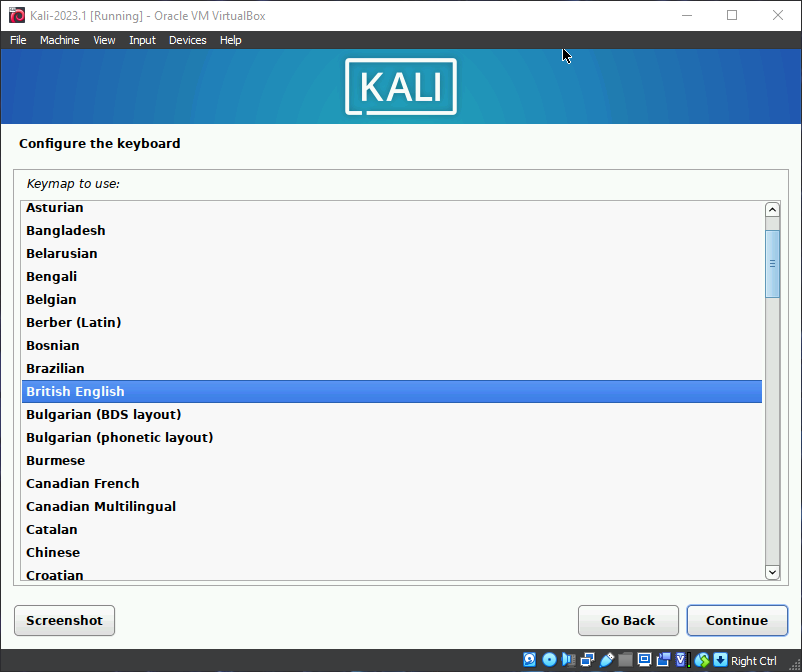
From here select the language, location and keyoard layout, all UK for me.
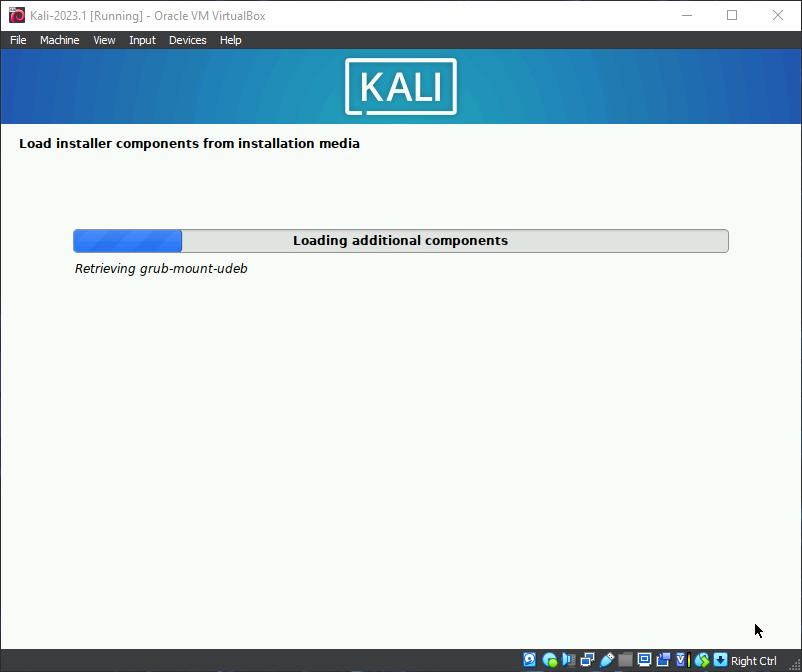
After the selection of your locale and whatnot it will then grab some files from the Iso file or ‘installation media’;
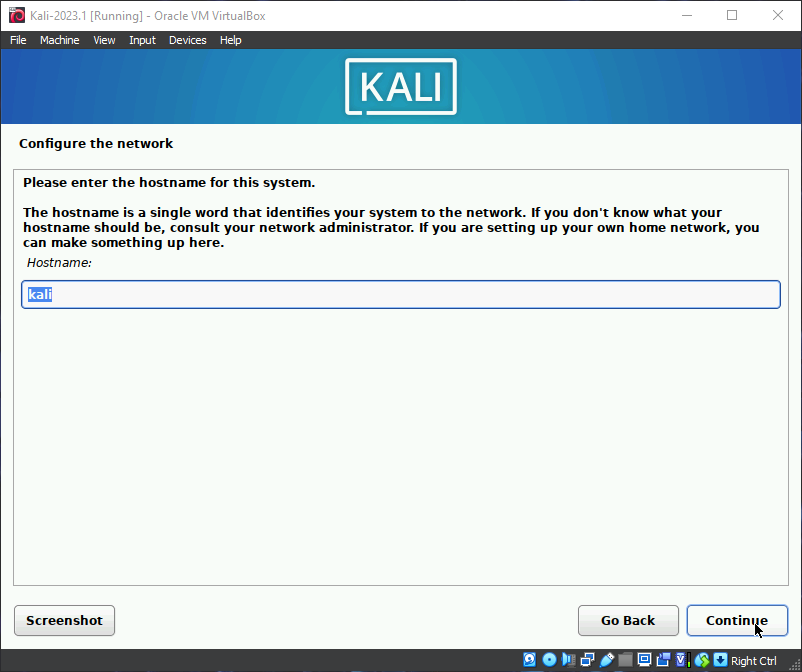
Next up you select the hostname for your ‘computer’. Now technically yes you can set this to whatever you want, however, in the world of information security and OPSEC trying to ‘blend in’ with a target environment on an Red Team Engagement/Pentest is advantageous, you would be wise to name it something like “DESKTOP-C8C1H5T” if you are targeting a Windows Network as this is similar to how Windows generically names new computers.
Blending in can have it’s advantages in the ‘real world’ but in our case, plain and simple kali works fine;
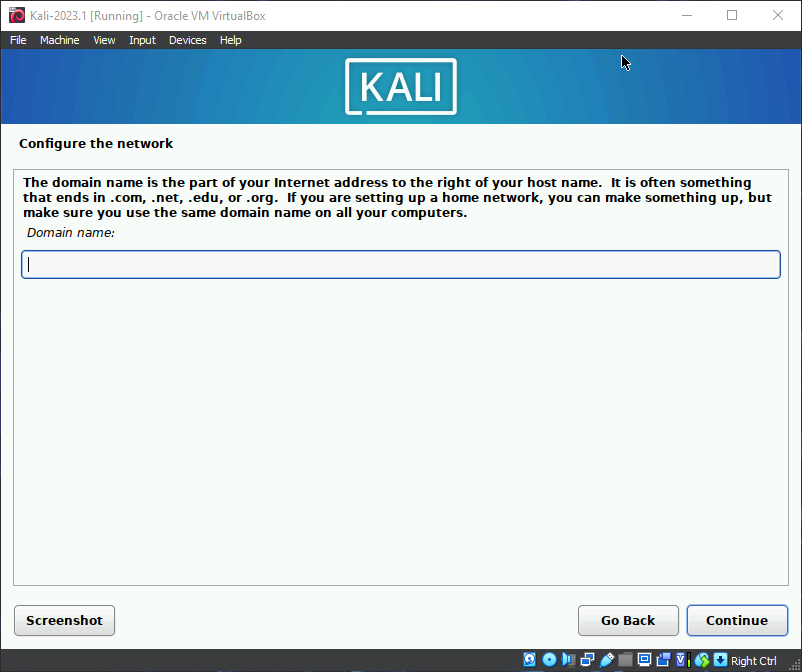
Same for the Domain name if you know this, in our example leaving it blank is fine.
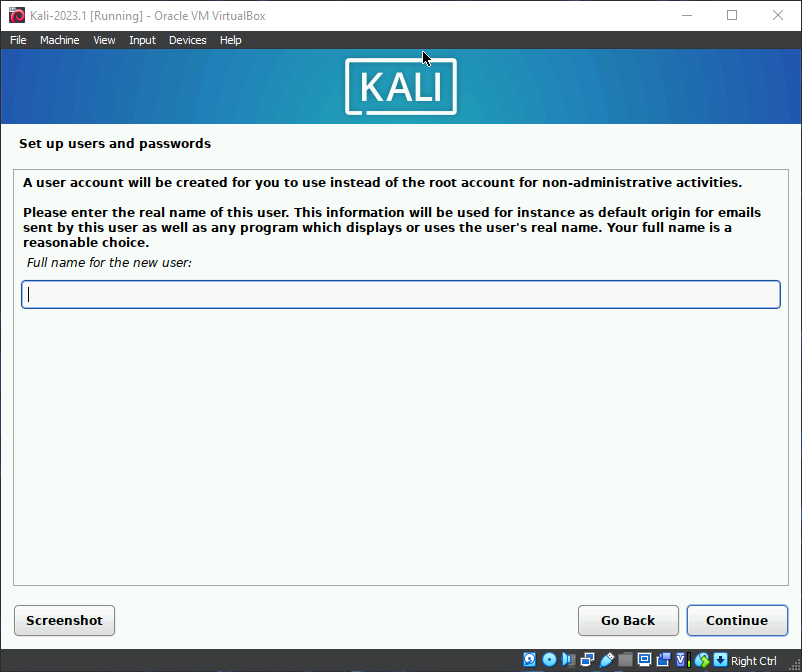
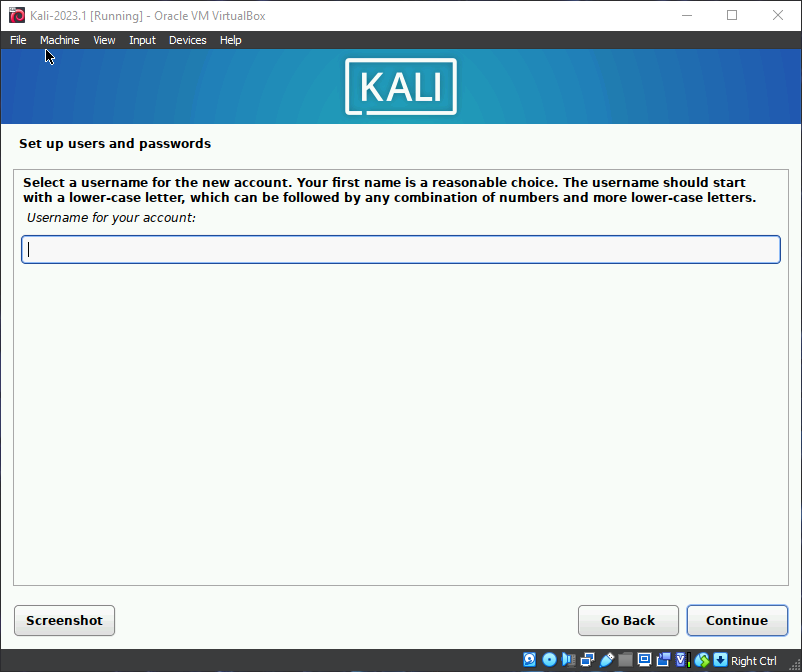
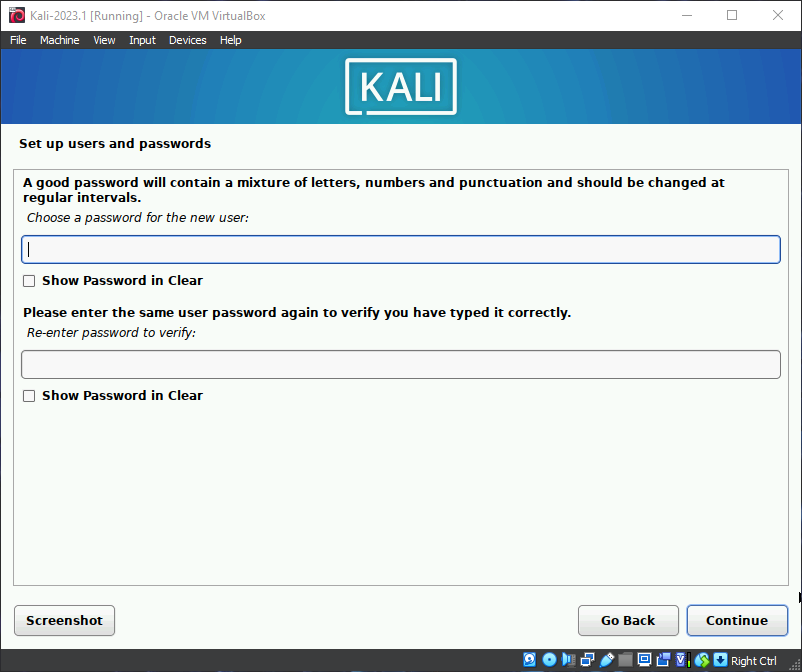
Now these next few steps with the above in mind (OPSEC) can be handy too, though in our case we are going with the name ‘pentester’ and the password of ‘123’ (I left these blank in the screenshots so you can make up your own, just don’t use 123 as a password, please).
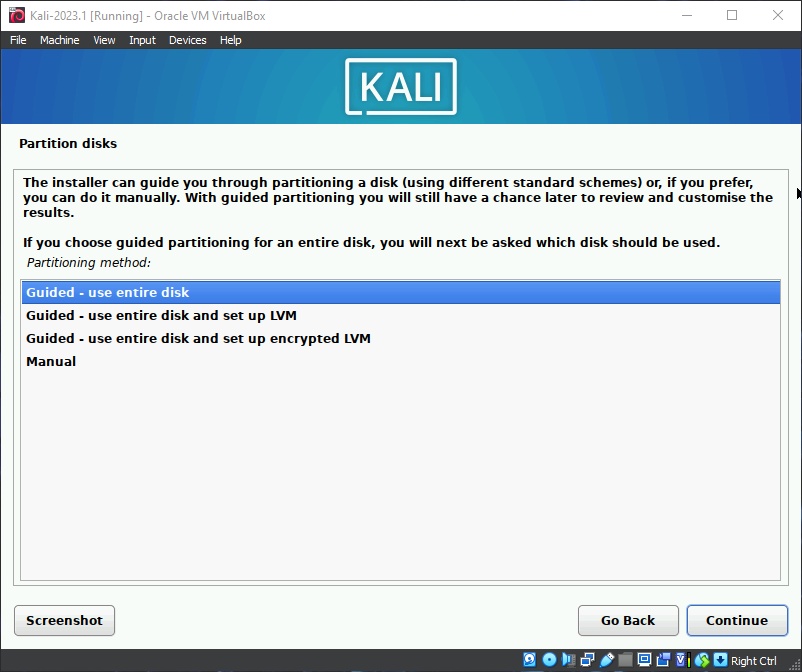
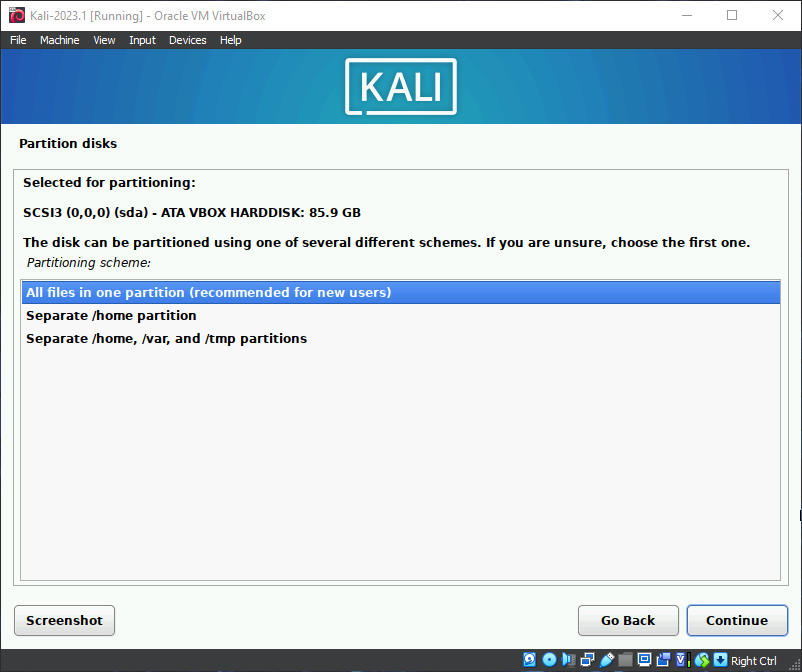
Next up we are partitioning our Virtual Hard Disk, this is similar to the USB option, in our case we are using the entire Virtual Hard Disk;
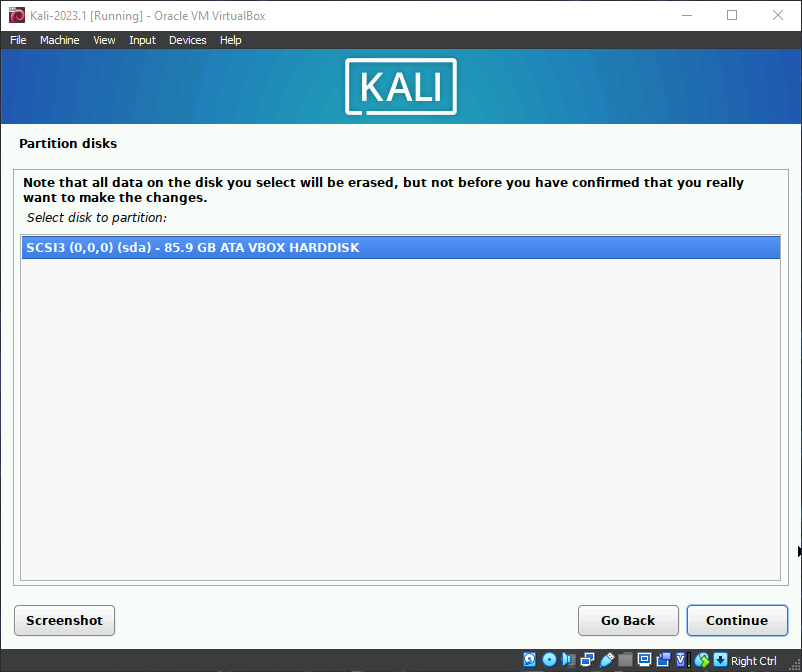
Select the hard disk and hit next;
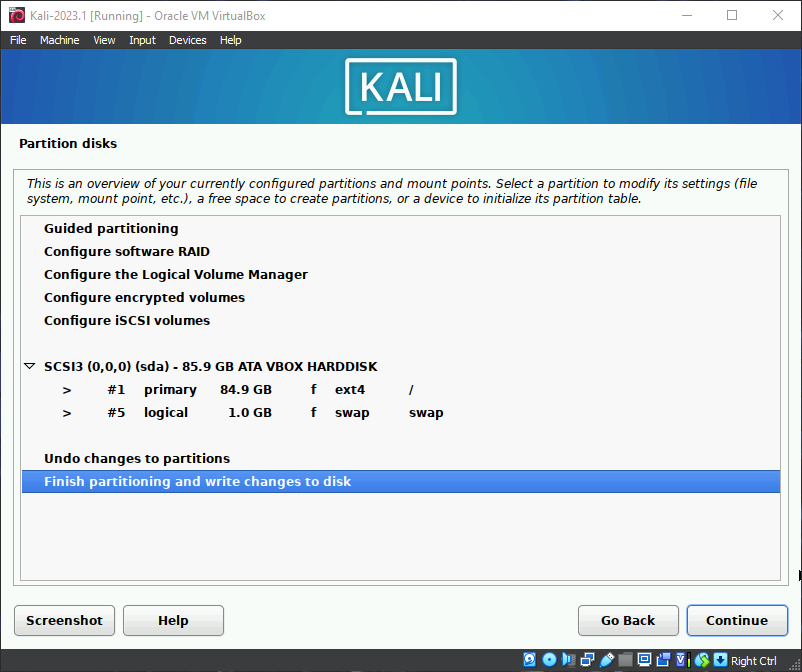
Here we are also going with the default option, all one big partition and all the file system together (just for simplicities sake).
We’re going to finish writing the changes to the Virtual Hard Disk;
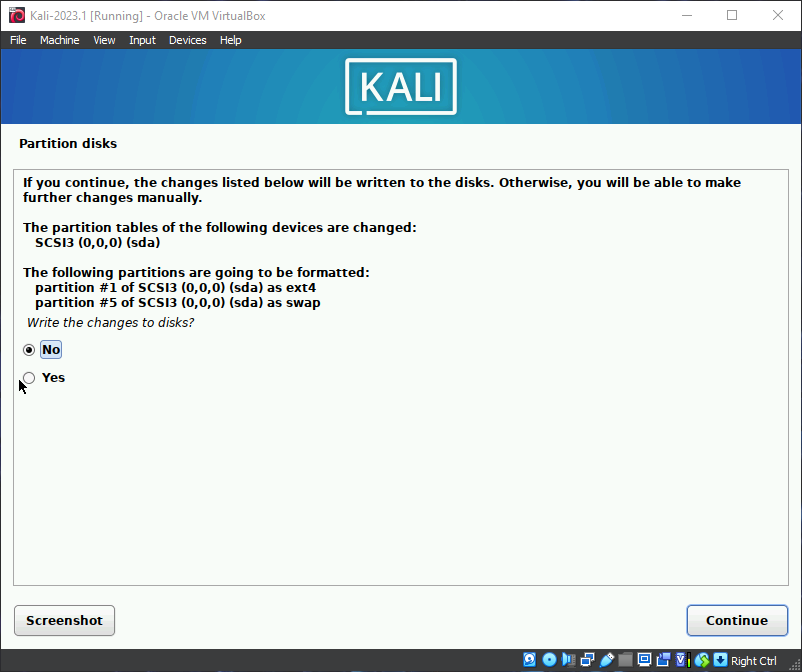
Here we actually select the only option that isn’t default after the last few and pick ‘yes’ to actually erase the disk and make the changes to the partitioning of it.
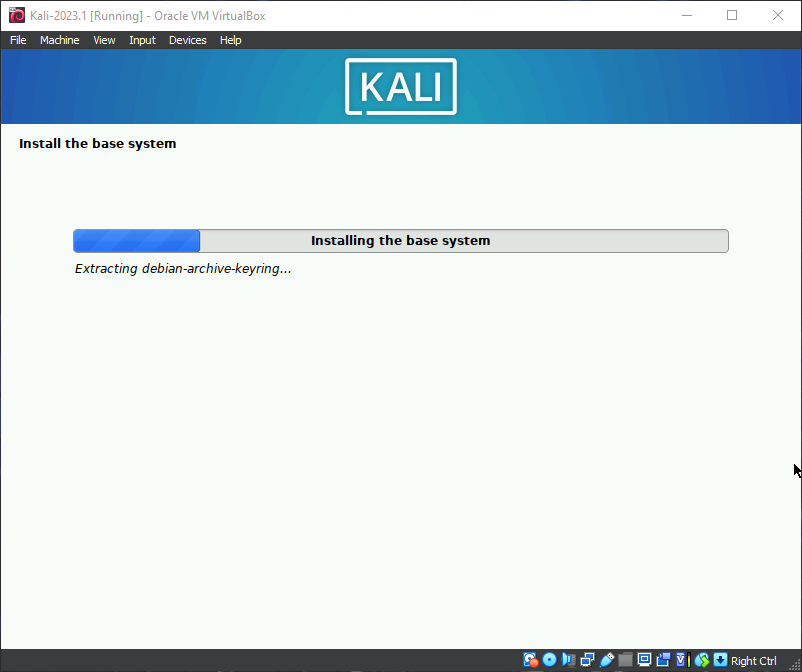
It will take a moment to throw some files at the new disk.
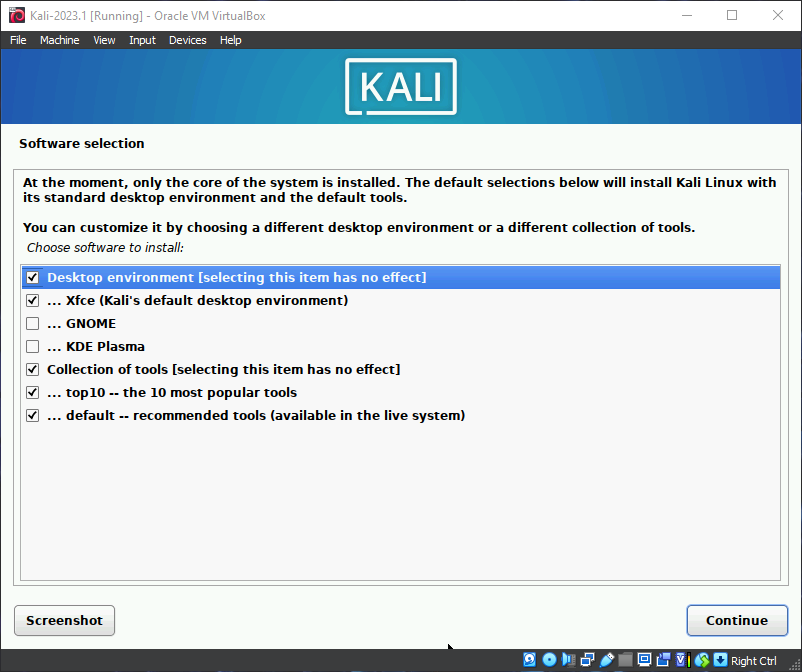
Here it will then prompt to set up the desktop environment, now you can pick your preferred flavor of Linux Desktop Manager here if you wish, Kali has shipped with XFCE as the default for a while now and is what most people these days would be familiar with, it did used to ship with GNOME and looked gorgeous with that side bar… but lo I digress, as it’s Linux we can customize however and whenever but for now default it is, it will also default select all the tooling needed so hit next.
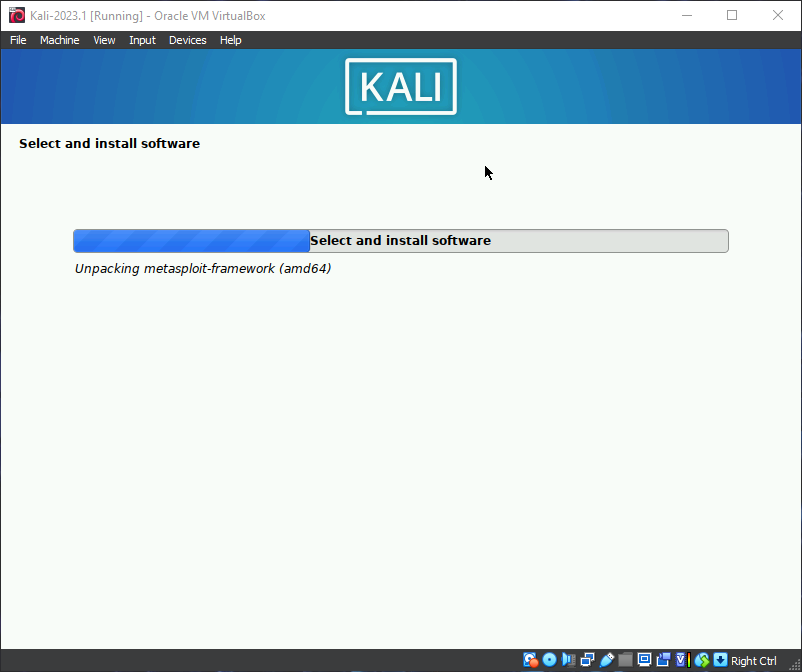
The begins more installation, probably the longer of the files being added, keen eyes may spot some familiar tools going on, look its MetaSploit!
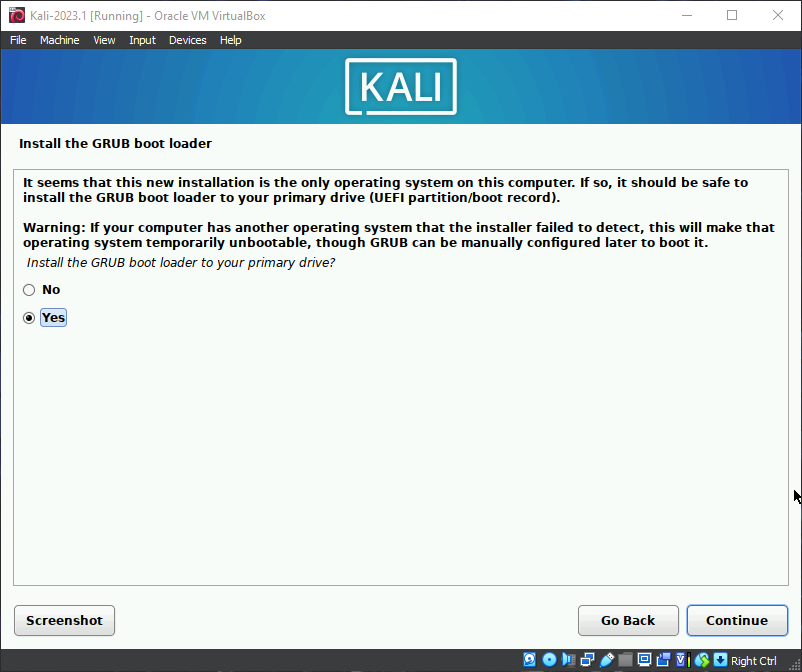
Next up we have the GRUB boot loader, now on our system we as we only have one OS we don’t need to worry too much about about installing GRUB to the primary ‘drive’ if you were dual booting this would remove your current boot manager and replace it with grub, allowing you to pick whenever the computer is powered on which OS you would like to boot.
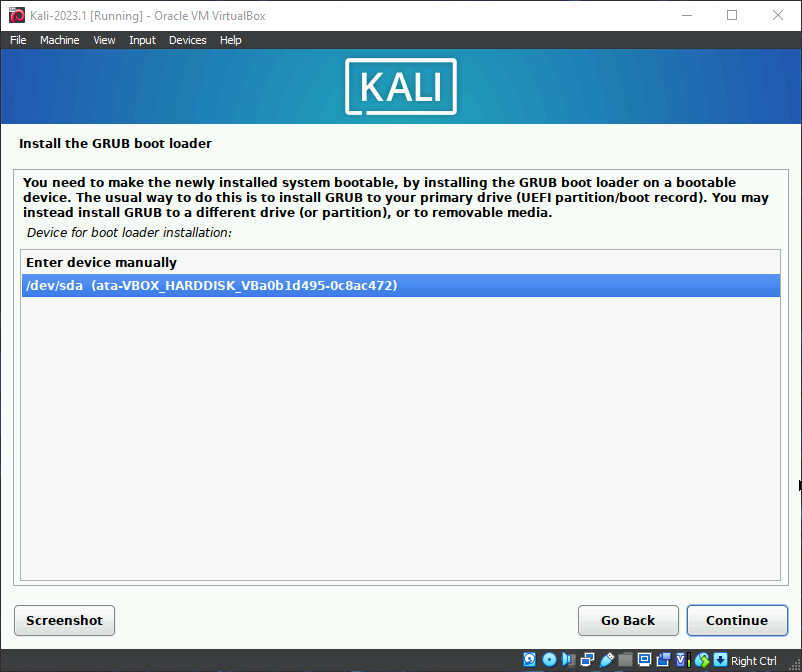
In our case we select /dev/sda the Virtualbox Hard Disk we just made.
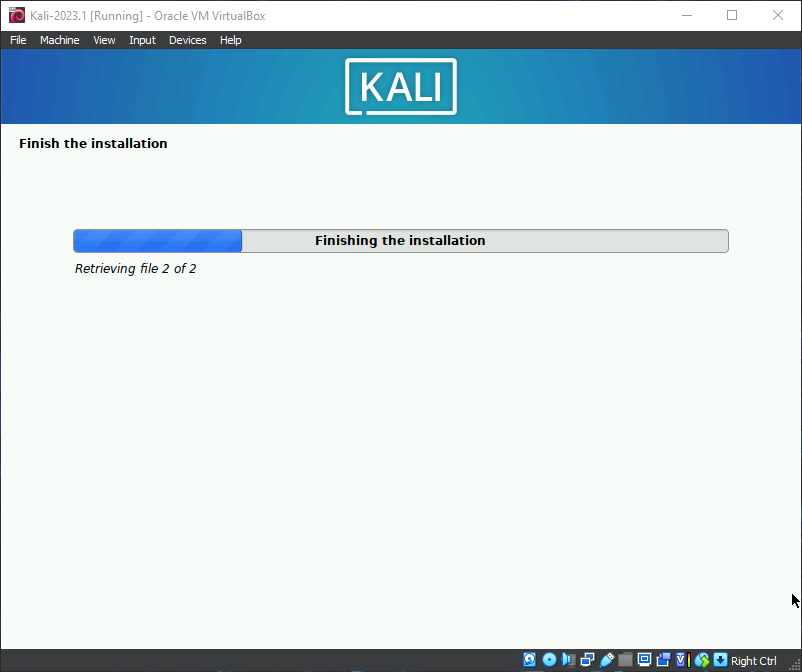
More loading…
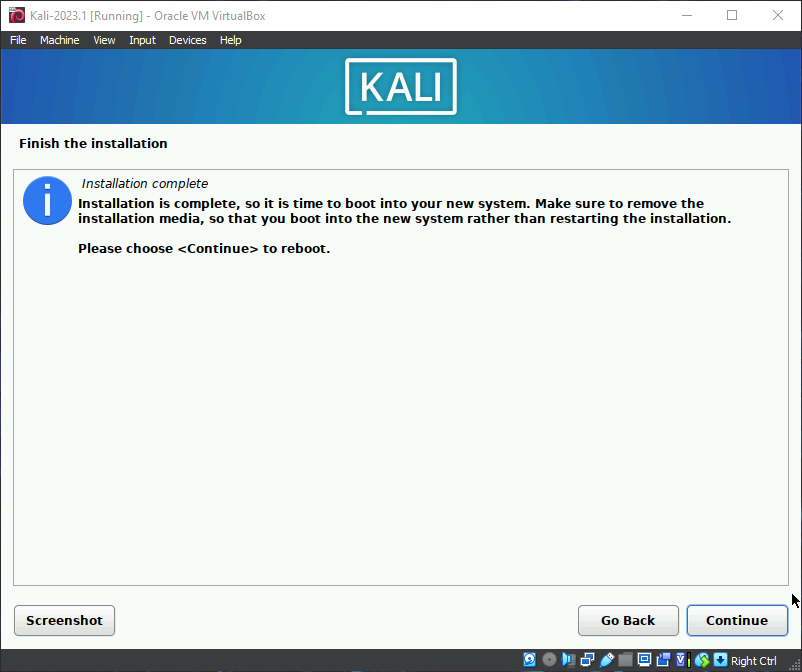
And we are finally presented with the ‘Finish Installation’ screen, click continue to reboot.
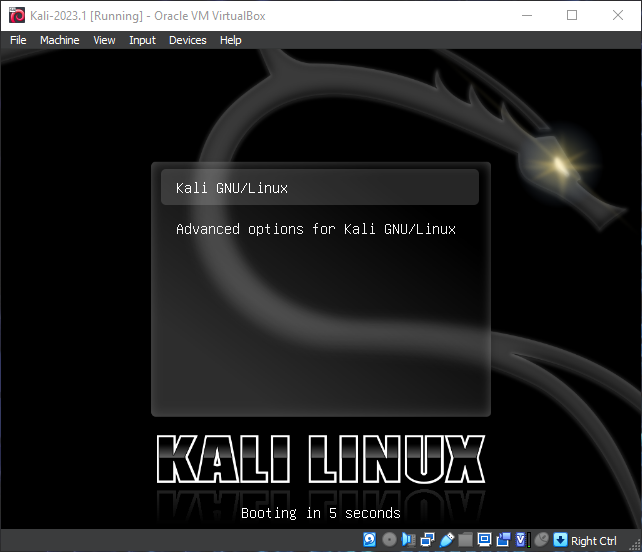
Now we have the GRUB Bootloader showing out option of the default Kali GNU/Linux or Advanced Options (thats for other things like checking memory integrity), it will boot the default option in 5 seconds anyway so you can hit enter or just leave it going.
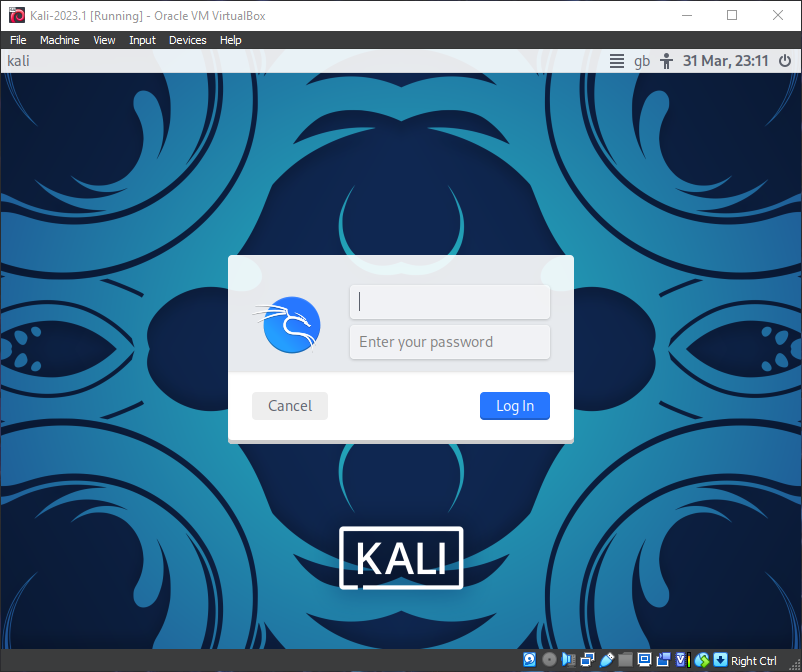
Et Voilla, we have our login screen and the bizarre Rorschach space goat looking wallpaper, lovely. Enter your details and get logged in!
Step 5 - Update
Now that we have Kali 2023.1 installed before we do anything, we need to update it and grab the latest versions of any apps.
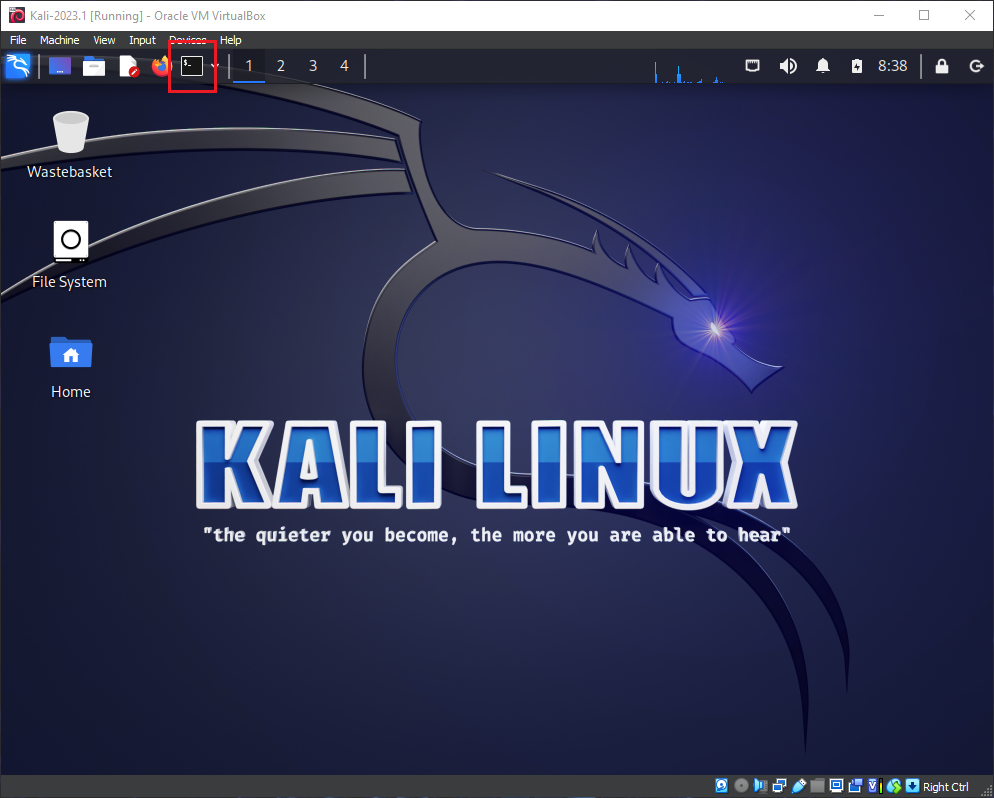
From the main Desktop open the terminal;
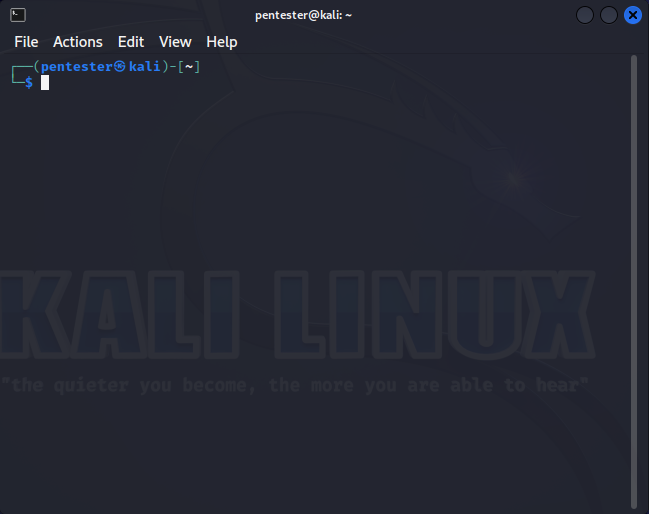
This is the terminal, the ‘main way’ of interacting with Linux and something you need to get used to;
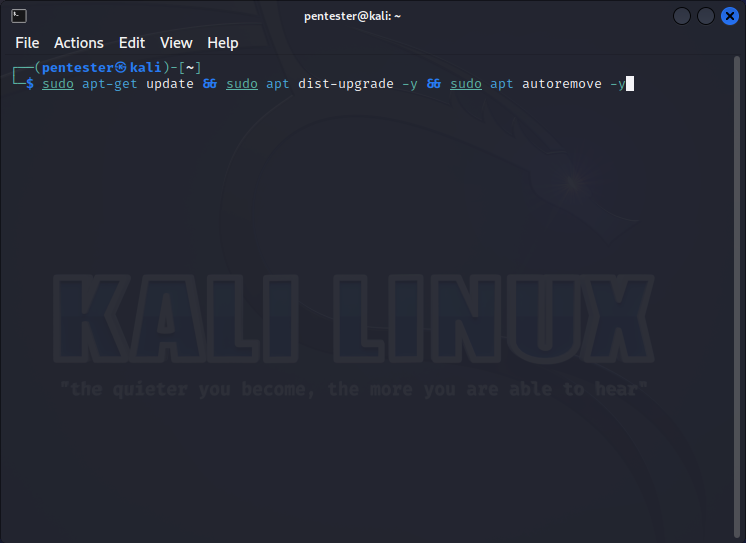
From here enter the following;
1
sudo apt-get update && sudo apt dist-upgrade -y && sudo apt autoremove -y
Now you may ask “Why have I entered all this?”, well let’s look at the command itself;
You are basically asking the computer to check for updates, install the updates and upgrade the system distribution if required and finally you are asking the computer to remove any old versions or applications that are no longer needed, the -y instructions basically mean that you won’t have to type in Y for yes on certain prompys like ‘hey I need an additional 300Mb of Hard Disk space to install these files, is that ok?
In an unattented install the installer would literally sit here waiting for the Y instruction, here it’ll just fly onward, now notice the Ampersand’s breaking up the three commands;
These are here for a reason, they are a failsafe for if there is an issue with the previous command it will stop the next command from being executed.
So, if our update fails, the rest of the command to upgrade and remove unnecessary files will not get run which saves the system spending time processing something it can’t change or processing a broken update and breaking loads more things;
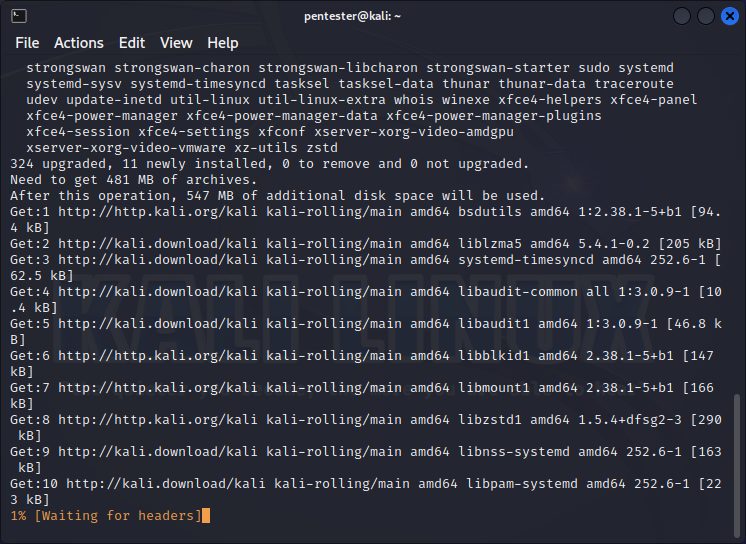
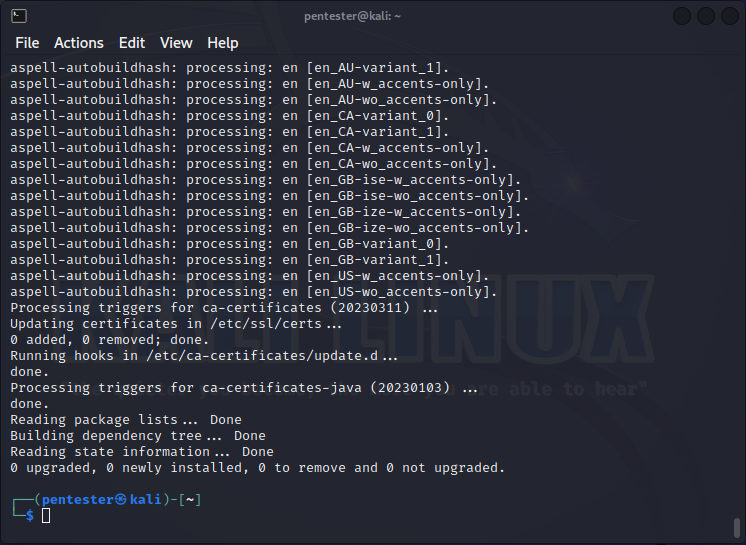
As everything went through all ok we are presented with the downloads progress and lots of wizzing past text.
After that Kali is now fully up to date and ready to roll;
A ‘best practice’ here is to reboot the machine, let it come fully back online and create whats called a ‘Snapshot’ which is basically a softare backup of your machine in it’s current state.
Snapshots are incredibly helpful for people, especially those into Malware Analysis as they may want to ‘detonate’ the malware (like WannaCry for example) to see what happens with the machine and instead of rebuilding the machine, simply roll it back to the snapshot before detonation, like it never happened!
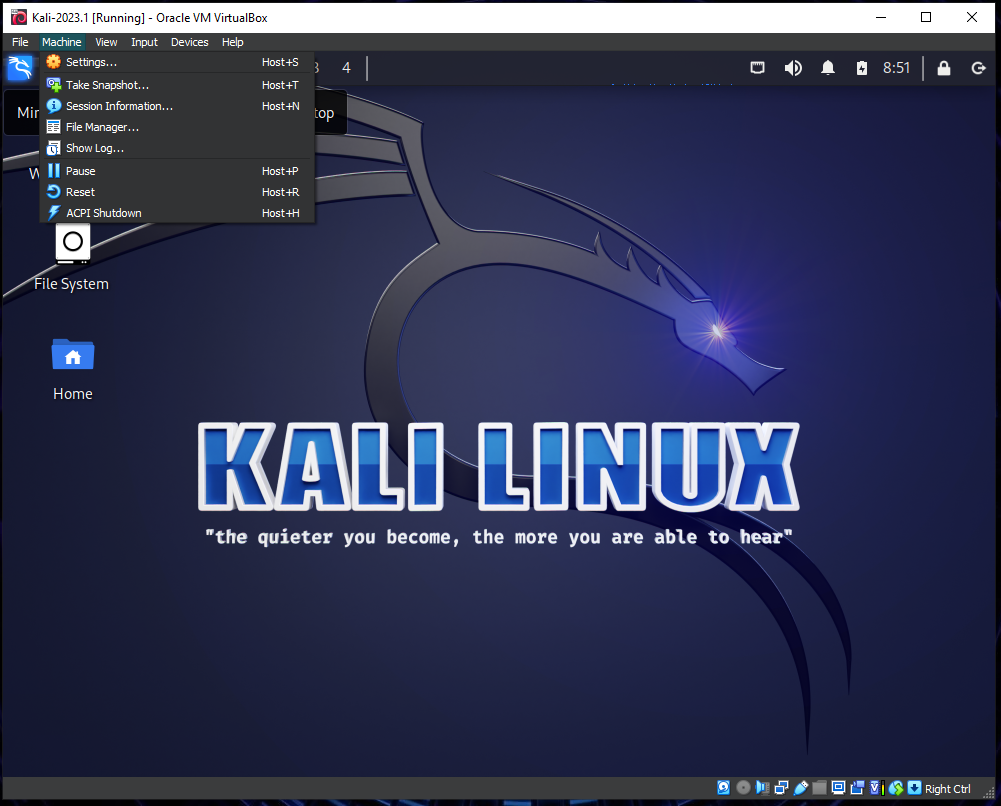
To do this simply click on ‘Machine’ from the top bar and then ‘Take Snapshot’.
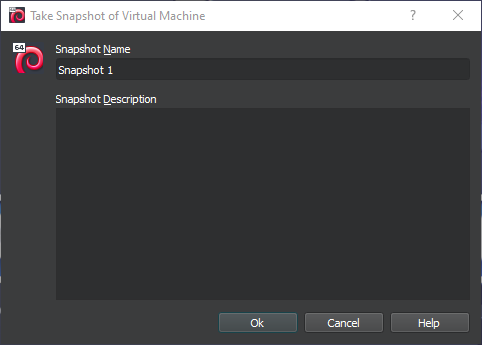
You will then need to name the snapshot (to make your life easier) and also pop in a description i.e. ‘base install all apps’ or similar.
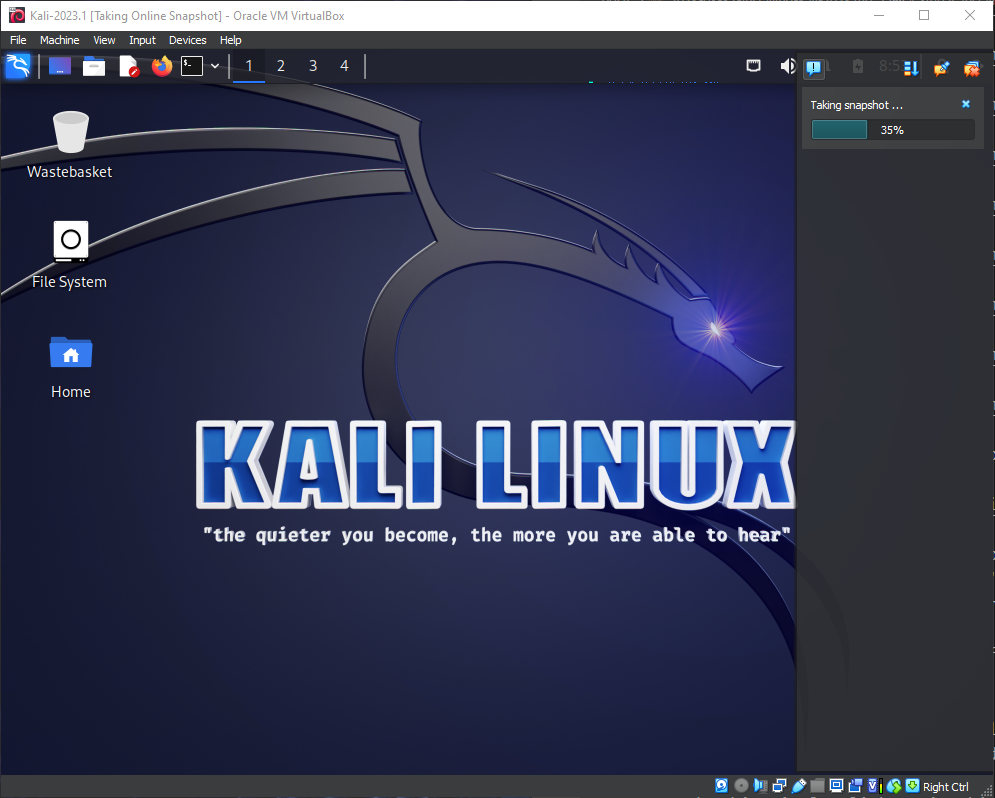
It will then generate the snapshot;
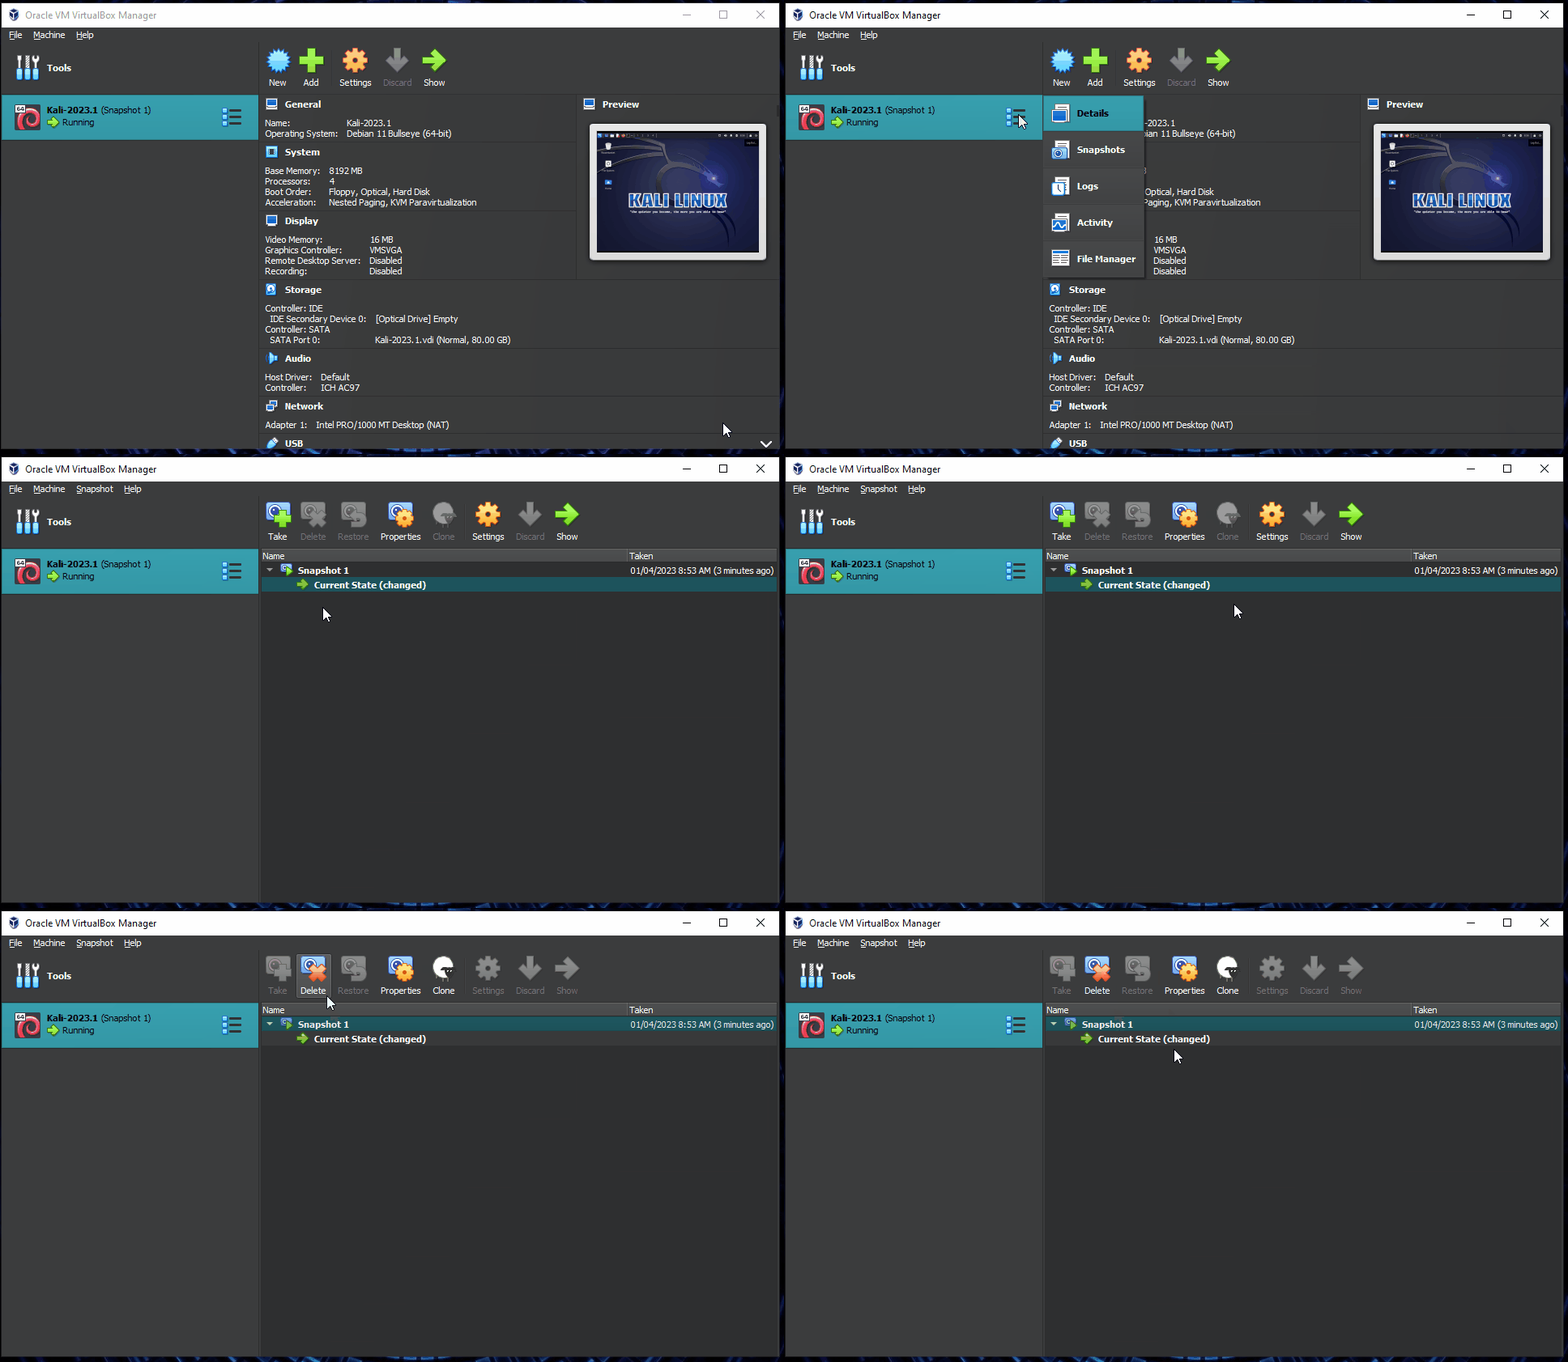
After that you are done, to roll it back simply head back to the Virtual Machine Manager, hit the options at the side of the Machine Name and select Snapshots;
As you can see above you can delete the snapshot if you wish or if you had multiple and want to ‘roll back’ select the appropriate snapshot and click restore.
Special Shoutout - The USB Option
If you wish to burn Kali to an USB you will first need a couple of things;
- The iso image from Offensive Security (Steps 1 and 2 from The Virtual Machine Option above)
- A USB thumb drive (8GB minimum is required).
- Software to burn the ISO image with.
Once you have assembled these it’s time to get started.
Step 1: Prepare the USB drive
It goes without saying that when your are burning software to USB or Disk, anything on the device will be removed so make sure you don’t have some important photos or documents on the USB drive.
Step 2: Burn the ISO image
For this step I am using the software Balena Etcher but you can use things like Rufus or others.
Select the ISO image, the USB drive (and check it’s the correct drive and not your spare hard disk or something) and click burn!
Step 3: Install your new Operating System
To boot from the USB drive you will need to check the hotkey your laptop or computer uses to enter the boot menu at startup, this can be Esc, F1, F11 or F12.
Once you have entered the boot menu you can select the USB drive and hit enter on the keyboard to boot.
For the rest of this step you can refer back to The Virtual Machine Option from the above as the ‘install’ steps are the same from this point forward, the only exception being if you are ‘dual booting’ Kali and your existing operating system, in which case the Graphical Install for Kali will guide you through this process and make the relevant changes to your installation and the GRUB bootmanager, you can also skip the snapshots as that won’t be an option on this setup.
Done
That’s all there is to it, now you have a brand now Virtial Machine of Kali Linux version 2023.1 working your on your computer (or your spare computer). Now you can do with it as you will, take on the OSCP or Pwn some machines on TryHackMe or HackTheBox, even begin looking into malware or reverse engineering the sky is the limit.
I hope this guide helps you understand the basics of installing the new Kali Linux Distribution, this can also apply to any other Operating system that you want to try out/break in your spare time.
I don’t have any sponsors or anything but if you enjoy my work, or feel sympathy for my wife, then I have set up a Ko-Fi account as well as a BuyMeACoffee people can donate to.
